How to Reduce Mildew on Bath Tiles: A Comprehensive Guide

Mildew on bath tiles is a common problem that many homeowners face. Not only does it look unsightly, but it can also lead to health issues and damage to your bathroom. Fortunately, with some proactive steps and regular maintenance, you can significantly reduce mildew growth and keep your bathroom looking fresh and clean. Here’s a comprehensive guide to help you tackle and prevent mildew on bath tiles.

Understanding Mildew

Mildew is a type of fungus that thrives in damp, warm, and poorly ventilated environments. In bathrooms, the combination of humidity, warmth from hot showers, and limited airflow creates an ideal breeding ground for mildew. It typically appears as a black, gray, or greenish film on tiles, grout, and other surfaces.

Steps to Reduce Mildew on Bath Tiles

1. Improve Ventilation

Proper ventilation is key to preventing mildew growth. Ensure your bathroom is well-ventilated by:

  • Installing an Exhaust Fan: A good exhaust fan will help remove moisture from the air. Run it during and after showers to keep humidity levels in check.
  • Opening Windows: If possible, open a window during and after showers to allow fresh air to circulate and reduce moisture levels.

2. Regular Cleaning

Consistent cleaning prevents mildew from taking hold. Follow these steps for effective cleaning:

  • Use Mildew-Resistant Cleaners: Choose cleaning products specifically designed to combat mildew. These often contain ingredients like bleach or antimicrobial agents.
  • Scrub Tiles and Grout: Use a non-abrasive brush or sponge to scrub tiles and grout regularly. Pay extra attention to grout lines, where mildew tends to accumulate.
  • Dry Surfaces Thoroughly: After cleaning, dry the tiles and grout with a clean towel to remove any remaining moisture.

3. Address Leaks and Water Issues

Leaks and excess water contribute to mildew problems. To address these issues:

  • Fix Leaks Promptly: Inspect pipes, faucets, and showerheads for leaks and repair them as soon as possible.
  • Check for Standing Water: Ensure there is no standing water in the shower or bathtub after use. Consider using a squeegee to remove excess water from tiles and glass.

4. Use Mildew-Resistant Products

Incorporating mildew-resistant materials and products can help reduce mildew growth:

  • Mildew-Resistant Grout and Sealers: When tiling or re-grouting, choose products that are specifically designed to resist mildew. Applying a mildew-resistant sealer can also help protect grout lines.
  • Water-Resistant Materials: Consider using water-resistant materials for bathroom fixtures and decor. These materials are less prone to mold and mildew growth.

5. Control Humidity Levels

Maintaining appropriate humidity levels can prevent mildew growth. To control humidity:

  • Use a Dehumidifier: In bathrooms with persistent humidity issues, a dehumidifier can help reduce moisture in the air.
  • Monitor Humidity Levels: Use a hygrometer to keep track of indoor humidity. Ideally, humidity levels should be kept between 30-50%.

6. Apply a Mildew-Resistant Coating

A mildew-resistant coating can add an extra layer of protection:

  • Mildew-Resistant Paint: For painted surfaces, such as bathroom walls, choose mildew-resistant paint. This type of paint helps prevent mold and mildew growth on the surface.

Quick Tips for Maintenance

  • Wipe Down Tiles After Use: Quickly wiping down tiles after showers can help remove excess moisture and reduce mildew on bath tiles risk.
  • Inspect Regularly: Regularly check for any signs of mildew or water damage and address issues promptly.
  • Use Natural Remedies: For a natural cleaning option, consider using a mixture of vinegar and water. Vinegar has mild antifungal properties that can help combat mildew.

Conclusion

Reducing mildew on bath tiles requires a combination of proper cleaning, improved ventilation, and proactive maintenance. By following these steps, you can maintain a clean and healthy bathroom environment. Remember, prevention is key, so stay on top of ventilation, cleaning, and moisture control to keep mildew at bay. With these practices in place, you’ll enjoy a fresher, more inviting bathroom for years to come.

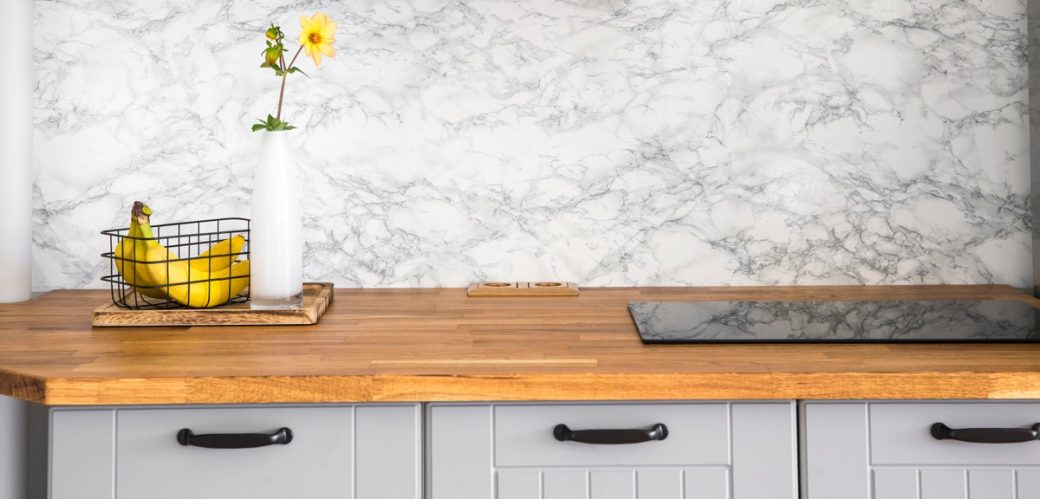
A Guide to Installing Handmade Look Tile on Walls

Adding handmade look tiles to your walls can infuse your space with unique character and warmth. Whether you’re renovating a bathroom, updating a kitchen backsplash, or revamping a feature wall, handmade look tiles offer an artisanal touch that can elevate the aesthetic of any room. Here’s a comprehensive guide to help you successfully install these charming tiles.

1. Choosing the Right Tile

Handmade look tiles come in various materials, colors, and patterns. Some popular options include:

  • Ceramic and Porcelain: These are versatile and durable, mimicking the appearance of handcrafted tiles.
  • Glass: Adds a glossy finish and reflects light, enhancing small spaces.
  • Natural Stone: Provides an authentic, rustic feel with natural imperfections.

When selecting your tiles, consider the room’s function and the desired visual impact. Test a few samples to see how they look in different lighting conditions and against your existing decor.

2. Preparing the Wall Surface

A smooth, clean surface is crucial for proper tile adhesion. Here’s how to prepare:

  • Remove Existing Coverings: Strip away old wallpaper, paint, or tiles.
  • Clean the Surface: Wash the wall with mild detergent and water, removing any grease or grime.
  • Repair Imperfections: Fill any holes or cracks with spackle or joint compound and sand smooth. For larger repairs, consider using a wall repair compound.
  • Prime the Wall: Apply a primer suitable for your wall type, especially if the wall is porous or previously painted.

3. Gather Your Tools and Materials

Ensure you have everything you need before starting:

  • Tile Cutter or Wet Saw
  • Notched Trowel
  • Tile Spacers
  • Level
  • Tile Adhesive (Thin-set Mortar)
  • Grout
  • Grout Float
  • Sponge and Water Bucket
  • Measuring Tape

4. Planning Your Layout

Planning helps prevent mistakes and ensures a professional finish:

  • Measure and Mark: Determine the center of your wall and draw a vertical and horizontal reference line. This will help in maintaining symmetry and alignment.
  • Dry Layout: Lay out tiles on the floor or a large surface to visualize the pattern and make adjustments before installing.

5. Applying Tile Adhesive

  • Mix the Adhesive: Follow the manufacturer’s instructions to achieve the correct consistency.
  • Apply Adhesive: Using a notched trowel, spread the adhesive on a small section of the wall. The notches create grooves that help the tiles adhere better.
  • Place the Tiles: Press each tile firmly into the adhesive, twisting slightly to ensure a good bond. Use tile spacers to maintain consistent gaps between tiles.

6. Cutting Tiles

  • Measure and Cut: Use a tile cutter or wet saw for precise cuts, especially for edge and corner tiles.
  • Fit and Adjust: Place cut tiles as needed, ensuring they fit snugly and align with the surrounding tiles.

7. Grouting the Tiles

  • Allow Adhesive to Set: Wait 24 hours or as per the adhesive’s instructions before grouting.
  • Apply Grout: Spread grout over the tiles using a grout float, pressing it into the gaps.
  • Clean Excess Grout: Wipe off excess grout with a damp sponge before it dries, being careful not to pull grout out of the joints.
  • Cure the Grout: Let the grout set for the time recommended by the manufacturer, usually 24-48 hours, before using the area.

8. Finishing Touches

  • Seal the Grout: Depending on the type of grout used, you might need to apply a grout sealer to protect it from moisture and stains.
  • Clean the Surface: After the grout has fully cured, clean the tile surface with a mild cleaner to remove any haze or residue.

9. Maintenance Tips

  • Regular Cleaning: Use a pH-balanced cleaner to maintain the tiles’ appearance.
  • Avoid Harsh Chemicals: Steer clear of abrasive cleaners and acids that can damage the tile surface or grout.
  • Inspect Regularly: Check for any signs of damage or wear and address them promptly to keep your installation looking fresh.

Conclusion

installing handmade look tile on walls  can dramatically transform a space, adding texture, color, and charm. By carefully planning, preparing, and executing your installation, you can achieve a beautiful and lasting result. Enjoy the unique character and artisanal touch that these tiles bring to your home!

The Rise of Wood-Look Tiles: A Stylish Alternative to Luxury Vinyl Tile (LVT)

https://www.belktile.com/wood-look/In recent years, wood-look tiles have surged in popularity, providing a stylish and practical alternative to traditional flooring options. Among the myriad of flooring choices available, wood-look tiles and luxury vinyl tile (LVT) are two contenders that often come up in design discussions. Both offer distinct advantages, but wood-look tiles are carving out a niche of their own. Here’s why wood-look tiles might be the superior choice for your next flooring project.

What Are Wood-Look Tiles?

Wood-look tiles are ceramic or porcelain tiles designed to mimic the appearance of real wood. They come in various sizes, colors, and textures, capturing the essence of natural wood with the durability of tile. Advanced printing technology allows these tiles to replicate the intricate grain patterns and textures of different wood species, making them nearly indistinguishable from the real thing.

Benefits of Wood-Look Tiles

  1. Durability and Maintenance: Unlike real wood, which can be susceptible to scratches, stains, and water damage, wood-look tiles are highly durable. They resist moisture, stains, and heavy traffic, making them ideal for areas like kitchens, bathrooms, and entryways. Cleaning is straightforward; a simple sweep and mop will keep them looking fresh.
  2. Versatility in Design: Wood-look tiles offer a range of styles and finishes that can complement various interior design themes. Whether you prefer the warm tones of oak, the rustic charm of reclaimed wood, or the sleek elegance of walnut, there’s a wood-look tile to match your vision. They can be used in a variety of settings, including modern, farmhouse, and industrial designs.
  3. Allergy-Friendly: Unlike carpet, which can harbor dust and allergens, wood-look tiles are hypoallergenic. They don’t trap dust or allergens, contributing to a cleaner and healthier indoor environment.
  4. Long-Term Investment: While the initial cost of wood-look tiles might be higher than some other options, their longevity and low maintenance requirements can make them a cost-effective choice in the long run. They are less likely to need replacement or extensive repairs compared to natural wood.

Comparing Wood-Look Tiles to LVT

Luxury Vinyl Tile (LVT) is another popular option that imitates the look of wood. It offers its own set of benefits, such as ease of installation and comfort underfoot. However, there are some key differences between LVT and wood-look tiles that might influence your decision:

  1. Durability: While wood look tiles over LVT is resilient and water-resistant, it can still be prone to scratches and dents, particularly in high-traffic areas. Wood-look tiles, on the other hand, are much harder and more resistant to physical damage, making them a better choice for high-use spaces.
  2. Moisture Resistance: Both options handle moisture well, but wood-look tiles excel in areas prone to high humidity or water exposure. They are less likely to warp or buckle compared to LVT, which can be sensitive to extreme conditions.
  3. Aesthetic Appeal: Wood-look tiles generally offer a more authentic look and feel of natural wood compared to LVT. The texture and depth of real ceramic or porcelain tiles often provide a more convincing imitation of wood grain.
  4. Installation and Comfort: LVT is known for its easy installation process, often featuring click-lock systems that make DIY projects manageable. It also provides a softer feel underfoot, which can be more comfortable for standing for long periods. Wood-look tiles typically require professional installation, including underlayment and grout work, but offer superior durability.

Conclusion

Choosing between wood-look tiles and LVT largely depends on your specific needs and preferences. Wood-look tiles stand out for their durability, realistic appearance, and longevity, making them a compelling option for those seeking a high-quality, long-term flooring solution. LVT, with its ease of installation and comfort, remains a strong contender, particularly in situations where a softer, more forgiving surface is desired.

Ultimately, both wood-look tiles and LVT offer unique advantages. By understanding the key differences and benefits of each, you can make an informed decision that aligns with your lifestyle and design goals.